Sometimes, you may wish to uninstall iTunes from your Mac to troubleshoot issues or perform a fresh reinstall. However, if you’ve tried to drag iTunes into the Trash, you’ve probably seen the following error message: “iTunes.the app can’t be modified or deleted because macOS requires it.” This can be confusing and frustrating, but don’t worry; there’s a solution to this issue. To uninstall iTunes, you must disable Apple’s System Integrity Protection (SIP) first and then remove the application manually.
How to Remove iTunes From Mac?
You can remove iTunes from your Mac if you Disable integrity protection (SIP) using the Utilities> Terminal option. In the final step, iTunes will be removed if you run the command: sudo rm -rf iTunes.app/. Additionally, you can remove iTunes using third-party software App Cleaner & Uninstaller.
How to Remove iTunes from Mac Manually?
Here’s how to go about it:


Disabling System Integrity Protection (SIP)
System Integrity Protection (SIP) is a security feature in macOS designed to protect your computer from certain types of software. Disabling SIP allows you to change system files, such as uninstalling pre-installed applications like iTunes.
Follow these steps to disable SIP:
- Restart your Mac.
- As your Mac restarts, press and hold the Command+R keys simultaneously. Keep holding until you see the Apple logo. This will boot your Mac into Recovery Mode.
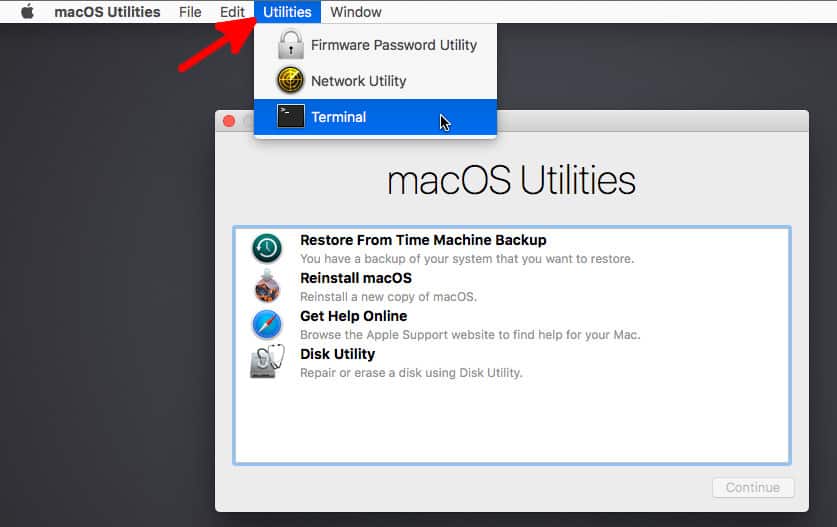
- In Recovery Mode, you’ll see a macOS Utilities window. From the top menu bar, click on Utilities and select Terminal.
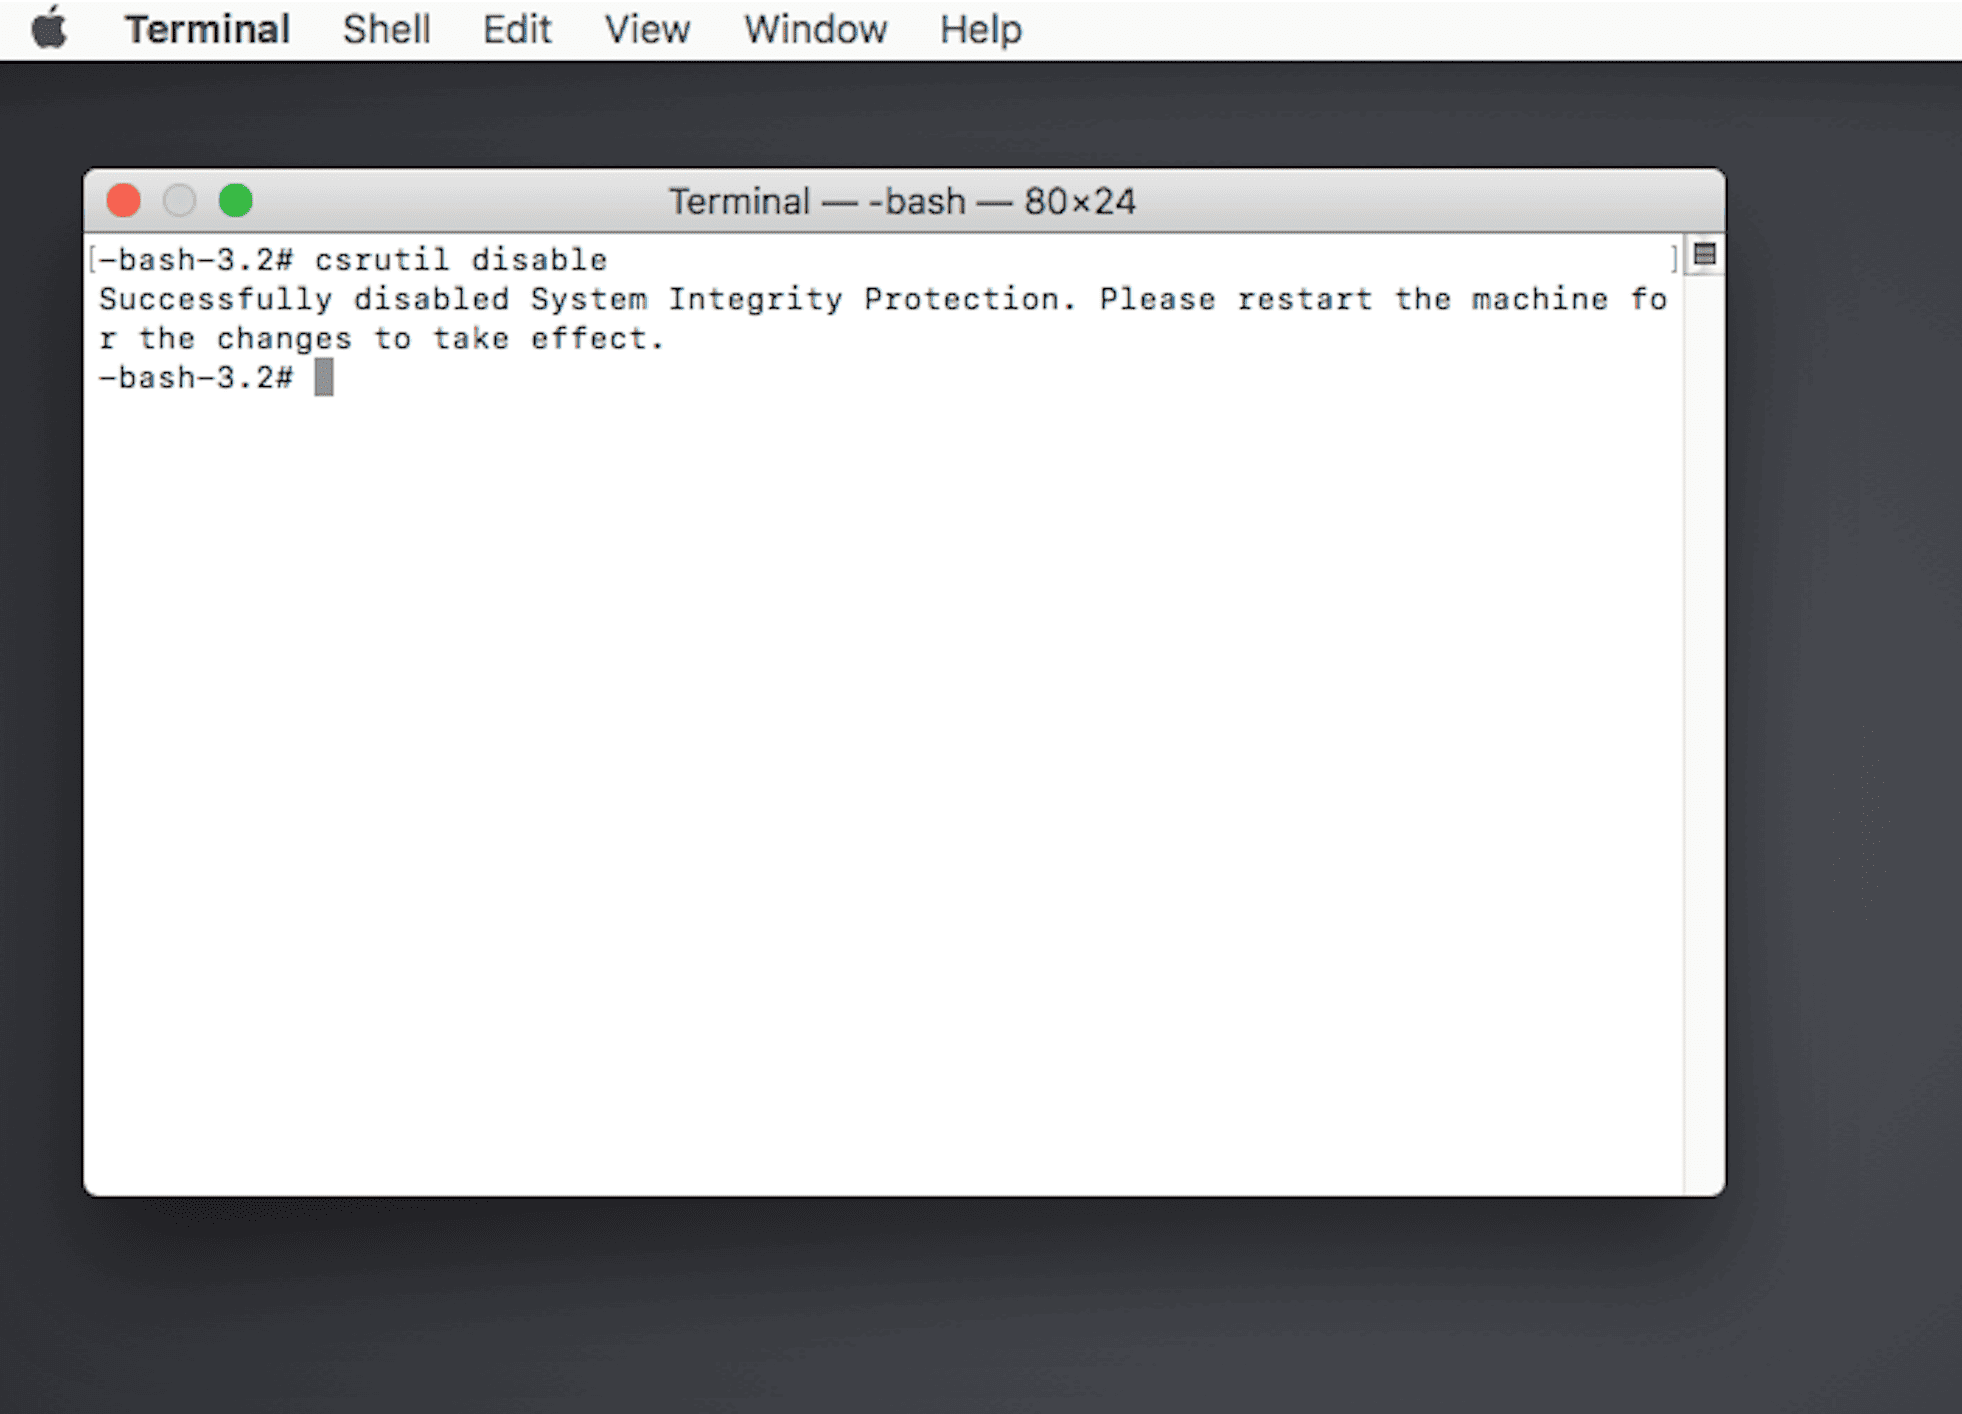
- Once the Terminal opens, enter the following command: csrutil disable. Press the Return key after typing in the command. This disables the System Integrity Protection.
- Restart your Mac again. You can do this by choosing Restart from the Apple menu or typing reboot in the Terminal.
Uninstalling iTunes
Now that you’ve disabled SIP, you can uninstall iTunes. Here’s how:
- Log in to your Mac with your administrator account. If you are not an administrator, you cannot delete default applications.
- Open Terminal. You can do this by clicking on the Spotlight (the magnifying glass icon at the top right), typing, and hitting Enter.
- In Terminal, type cd /Applications/ and press Return. This command changes the directory to your Applications folder.
- Then, you need to remount your System Applications folder with read and write permissions. For this, type the following command and hit Return:
sudo mount -uw /System/Applications
- Finally, to delete iTunes, enter the following command and press. Return:
sudo rm -rf iTunes.app/
That’s it! You’ve successfully uninstalled iTunes from your Mac. Unfortunately, this process is complex because Apple considers iTunes a vital part of macOS. Therefore, proceed with caution and make sure you follow the instructions carefully.
If you want to reinstall iTunes, you can easily download it from the Mac App Store or the Apple website.
Disclaimer: Disabling System Integrity Protection (SIP) reduces the level of security on your Mac. After you’ve uninstalled iTunes, it’s recommended that you re-enable SIP to keep your Mac secure. To do this, follow the steps in the first section but use the command csrutil enable instead of csrutil disable. This will re-enable System Integrity Protection on your Mac.
How to Remove iTunes From Mac using App Cleaner & Uninstaller?
Sometimes, you may want to uninstall iTunes from your Mac, clean up its service files, or even reset the app’s initial state. Doing this manually can be daunting, but there’s a way to make it much easier and safer. The solution uses a unique software tool called App Cleaner & Uninstaller, developed by Nektony.
App Cleaner & Uninstaller was explicitly designed to uninstall and reset applications to their initial state. The tool finds all the service files associated with an application and removes them thoroughly, quickly, and safely with just a few clicks.
Although Apple does not permit uninstalling its default apps, you can use App Cleaner & Uninstaller to remove the service files associated with these apps and reset them. Removing service files can help resolve specific application issues, clean up your disk space, and optimize your Mac’s performance.
Here’s how to use App Cleaner & Uninstaller to remove iTunes (also known as Music) service files:

Getting Started
- Launch App Cleaner & Uninstaller. If you haven’t already, download App Cleaner & Uninstaller from the official Nektony website. Once downloaded, launch the app.
Enabling System Applications
- Go to Preferences. You can access this by clicking on the ‘App Cleaner & Uninstaller’ menu in the top left corner and selecting ‘Preferences.’
- Enable ‘Display System Applications.’ Then, in the Preferences window, go to the ‘General’ tab and check the box next to ‘Display System Applications.’ This allows the tool to scan and display system apps like iTunes.
Selecting and Removing iTunes Service Files
- App Cleaner & Uninstaller will automatically rescan your apps after you enable system applications. The tool will display the rescanned apps in the left section of its window.
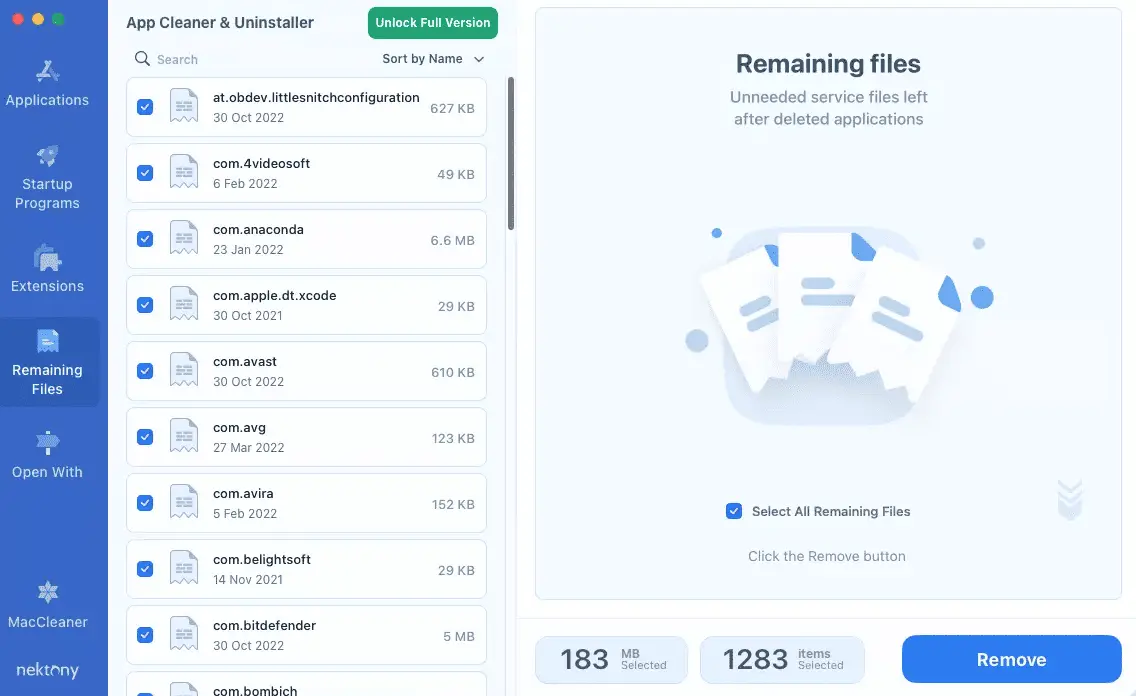
- Select iTunes in the application list. Next, scroll through the application list and select iTunes (or Music, in newer macOS versions). This will display the service files associated with iTunes in the right section of the window.
- Click the ‘Remove’ button. Once you’ve selected iTunes, click the ‘Remove’ button to remove the app’s associated service files.
- Confirm the removal. A confirmation window will pop up, asking if you want to remove the selected items. Click the appropriate button to confirm the removal of iTunes service files.
And that’s it! You’ve successfully removed iTunes service files using App Cleaner & Uninstaller from your Mac. It’s a straightforward, efficient, and secure way to maintain your Mac, resolving app issues and freeing up disk space. Moreover, this technique can be used for iTunes and other apps installed on your Mac, making it an essential tool for your Mac’s overall health and performance.
Disclaimer: Always exercise caution when removing system applications and their service files, as this may affect the functioning of other applications or the system itself. Always ensure you have a backup of your important data before performing such operations.


Learn more about authors in Nimblefreelancer's team biography page.
- 6 Proven Ways SaaS Founders Actually Get Customers (With Real Examples) - December 17, 2025
- Facebook Ads to Get Followers! - December 27, 2024
- ClickUp vs. Slack - December 20, 2024