The Logitech Wireless Mouse is popular among computer users due to its high-performance capabilities and ease of use. This versatile device features advanced tracking technology that accurately tracks even the most complex movements. At the same time, its built-in rechargeable battery ensures that it stays powered up and is always ready to go. Additionally, thanks to its ergonomic design, this wireless mouse is comfortable for extended periods without causing any strain or discomfort. Whether you are a casual user or a serious gamer, the Logitech Wireless Mouse will meet your needs and exceed your expectations.
How to Connect Logitech Mouse?
There are two ways to connect your Logitech mouse to your computer, depending on whether you want to use a Bluetooth or a Wireless mouse with a tiny unifying USB Bluetooth receiver. Pair your mouse with your computer using the built-in settings for a Bluetooth connection. For a wireless USB connection, plug in the receiver that comes with your mouse and follow the prompts to install any necessary drivers.


Once your Logitech mouse is connected, you can use it immediately for all your computer tasks. Whether you need to navigate through documents and folders, edit photos and videos, or play games with high-precision controls, this versatile and reliable mouse has you covered. With its long battery life and ergonomic design, you can enjoy a comfortable and seamless experience while you work or play. So, if you’re looking for a fast and easy way to connect your Logitech mouse, follow these simple steps to get started today.
How do I connect the Logitech Wireless Mouse with the PC?
If you have a Logitech wireless mouse and want to connect it to your PC, follow these simple steps:
- Unpack the Logitech mouse from its box and insert a battery into it. Ensure the batteries are aligned correctly, with the positive and negative contacts in the correct positions.
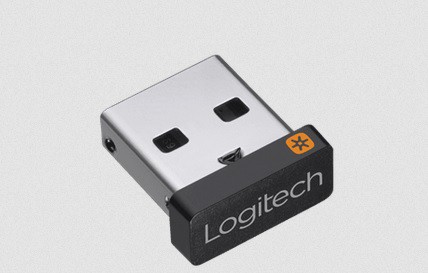
- Next, plug the tiny unifying USB Bluetooth receiver that came with your mouse into one of your computer’s open USB slots.
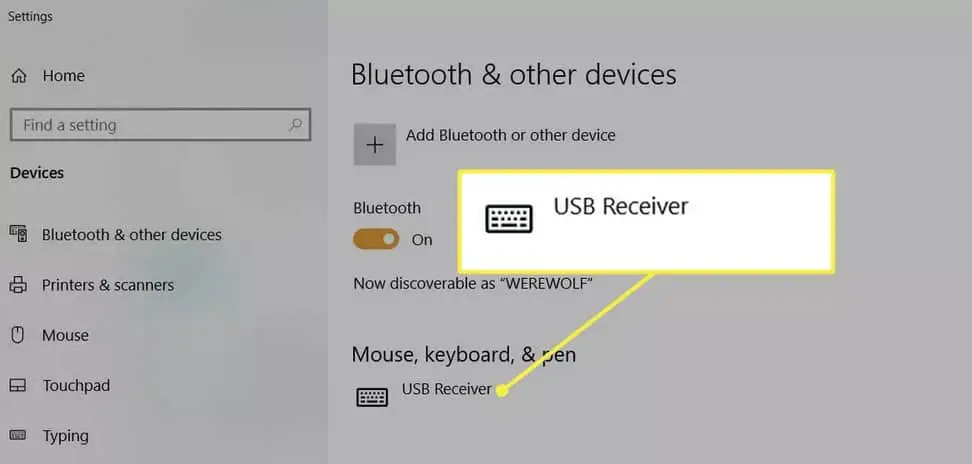
- Your mouse automatically connects wirelessly to your PC. The USB receiver for your Logitech mouse will be displayed as a USB device in your computer’s list of Bluetooth devices. Adjust your mouse speed and sensitivity, move the mouse around on your screen, and ensure it is optimized for your use. Depending on your use, such as gaming or web browsing, you may need to make some adjustments.
Below, you can see a tiny USB unifying Bluetooth receiver:
How do I connect the Logitech Bluetooth Mouse to the PC?
You must follow several steps when you want to connect a Logitech Bluetooth mouse to your PC.
- First, you must ensure your PC has Bluetooth enabled and the mouse is turned on.
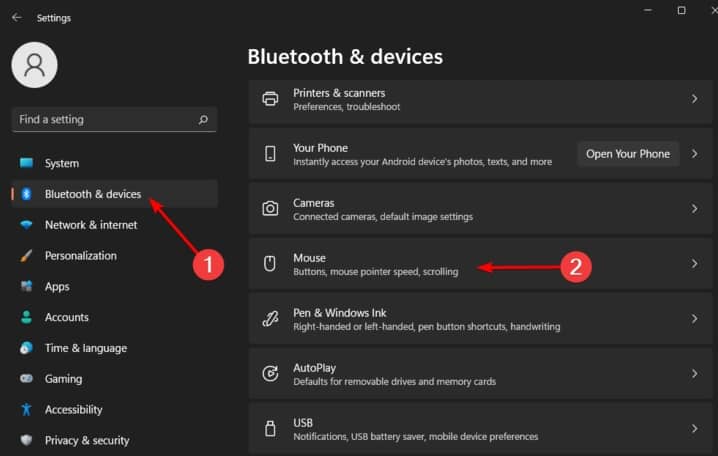
- Then, it would help to go to the Start Menu and select Settings. From there, you should be able to find and choose the Bluetooth and other devices option in the window’s left pane.
- Next, you will newindow’slect Add device in the main settings window. If it hasn’t already, click on the switch next to this option to enable Bluetooth.
- Once your computer has detected your Logitech Bluetooth mouse, you should be able to see its name listed in the list of available devices. Select this device and click the Pair button to connect it to your PC. Once connected, you should be able to use your Logitech Bluetooth mouse like any other wireless mouse connected to your computer.
How to install the Wireless Mouse on Windows
Firstly, open the Start icon at the bottom left of the Windows taskbar. Here, choose ‘Settings’ and then pick ‘Devices.’ In the Devices menu, you’ll notice an option named ‘Add Bluetooth or other devices.’ When you choose this option, you will see available Bluetooth-enabled devices.
Before proceeding, check that your mouse is switched on. If not, press the Connect button in the above-explained manner. Also, some of the mouse devices carry a Channel switch. The purpose of this button is to give you the choice of Bluetooth channels while pairing. Your mouse may or may not have this, but if it is there, it ensures that you have pressed it and chosen the appropriate channel before pushing Connect.
When you press the Connect switch, your mouse appears in the Bluetooth options on your PC. Click on the appropriate device name, which will appear in the ‘available devices’ menu. Then, click’on its namdevices’ and the wireless mouse will start working.
How to install the Wireless Mouse on Mac
You must click the ‘Bluetooth’ icon at the top right of our Mac menu bar. You will see a choice to display ‘Bluetooth Preferences.’ This option shows a list of Bluetoo-enabled devices paired with your PC.

Then, turn on the wireless mouse and press the ‘Connect’ switch. Concerning the ‘Cha’nel’ switch, do as explained above. When the mouse is switched on, it will be discoverable on the Mac in the options given under ‘Bluetooth Preferences.’ Once you see’its name, click on the’‘Connect’ option on Mac (present besi’e the n’me).
If the mouse is installed, it says ‘Connected,’ but now there will be no’ Connect ‘option alongside its name. Finally, check the mouse by moving it around.
You can go even further and pair two Logitech Devices with the same USB Receiver. See the instructions in the video below:
Wireless MouseTroubleshooting
If the mouse doesn’t work, you need to examine cerdoesn’tings. Firstly, check if the mouse is switched on. Then see if it is within 30 feet range of the USB receiver. Next, ensure that the receiver is properly plugged in. Sometimes, the issue may be with a particular USB port. You may try using another USB port of your system.
You may have to change the receiver if the mouse doesn’t function. For this, the download doesn’t include Logitech Mouse and Keyboard’Software’ on Mac or ‘Logitech Connection Utility Software on Windows. These applications will help you connect the mouse to the new receiver. Both applications are pretty easy to understand. All you need to do is follow their instructions to complete the installation process.
While either of the above techniques will let you point out the fault, sometimes it’s just an improper battery insertiit’sSo, always check if the batteries are inserted well and in the correct direction.
Final Tips
- When the driver installation is complete, the wireless mouse must start functioning instantly. But if that doesn’t happen, you may need to restadoesn’t PC.
- The on-screen instructions for downloading the driver may differ for various Logitech models.
Conclusion
To connect a Logitech mouse to a PC, you must first install the driver software that comes with your mouse. This can typically be done by inserting the CD that came with your mouse into your computer’s disc drive and following tcomputer’s.
Once the drivers have been successfully installed, you must connect the USB, or Bluetooth receiver included with your mouse to an available USB port on your computer. Once the receiver has been secured, plug in or turn on your mouse to start using it.
If you have difficulty connecting your Logitech mouse, it may be helpful to consult the manufacturer’s instructions or contacmanufacturer’ser support for additional assistance. With some patience and persistence, however, you should be able to easily connect your Logitech mouse to your PC and start taking advantage of its many benefits.


Learn more about authors in Nimblefreelancer's team biography page.
- 6 Proven Ways SaaS Founders Actually Get Customers (With Real Examples) - December 17, 2025
- Facebook Ads to Get Followers! - December 27, 2024
- ClickUp vs. Slack - December 20, 2024