Building a French drain in your backyard can effectively keep water out of your home, protect against flooding, and ensure the soil does not erode. A French drain is a shallow trench filled with gravel or another material, like crushed stone, that can help redirect water away from structures and direct it into a safe area.
This type of drainage system typically involves digging a trench 8 inches deep and up to 3 feet wide, depending on surface area and needs. The bottom of the trench should be covered with filter fabric before the gravel is added so that no fine particles enter the drain. Once the gravel has been added, additional layers of filter fabric may be used to help prevent leaves and other debris from entering. The sides and top are then covered with soil or sod for aesthetic purposes.
What is a French drain?
French drain represents a system that captures and removes groundwater. French drain represents a channel with a perforated drainage pipe filled with coarse-grained aggregate and serves to drain water resulting from rainfall.


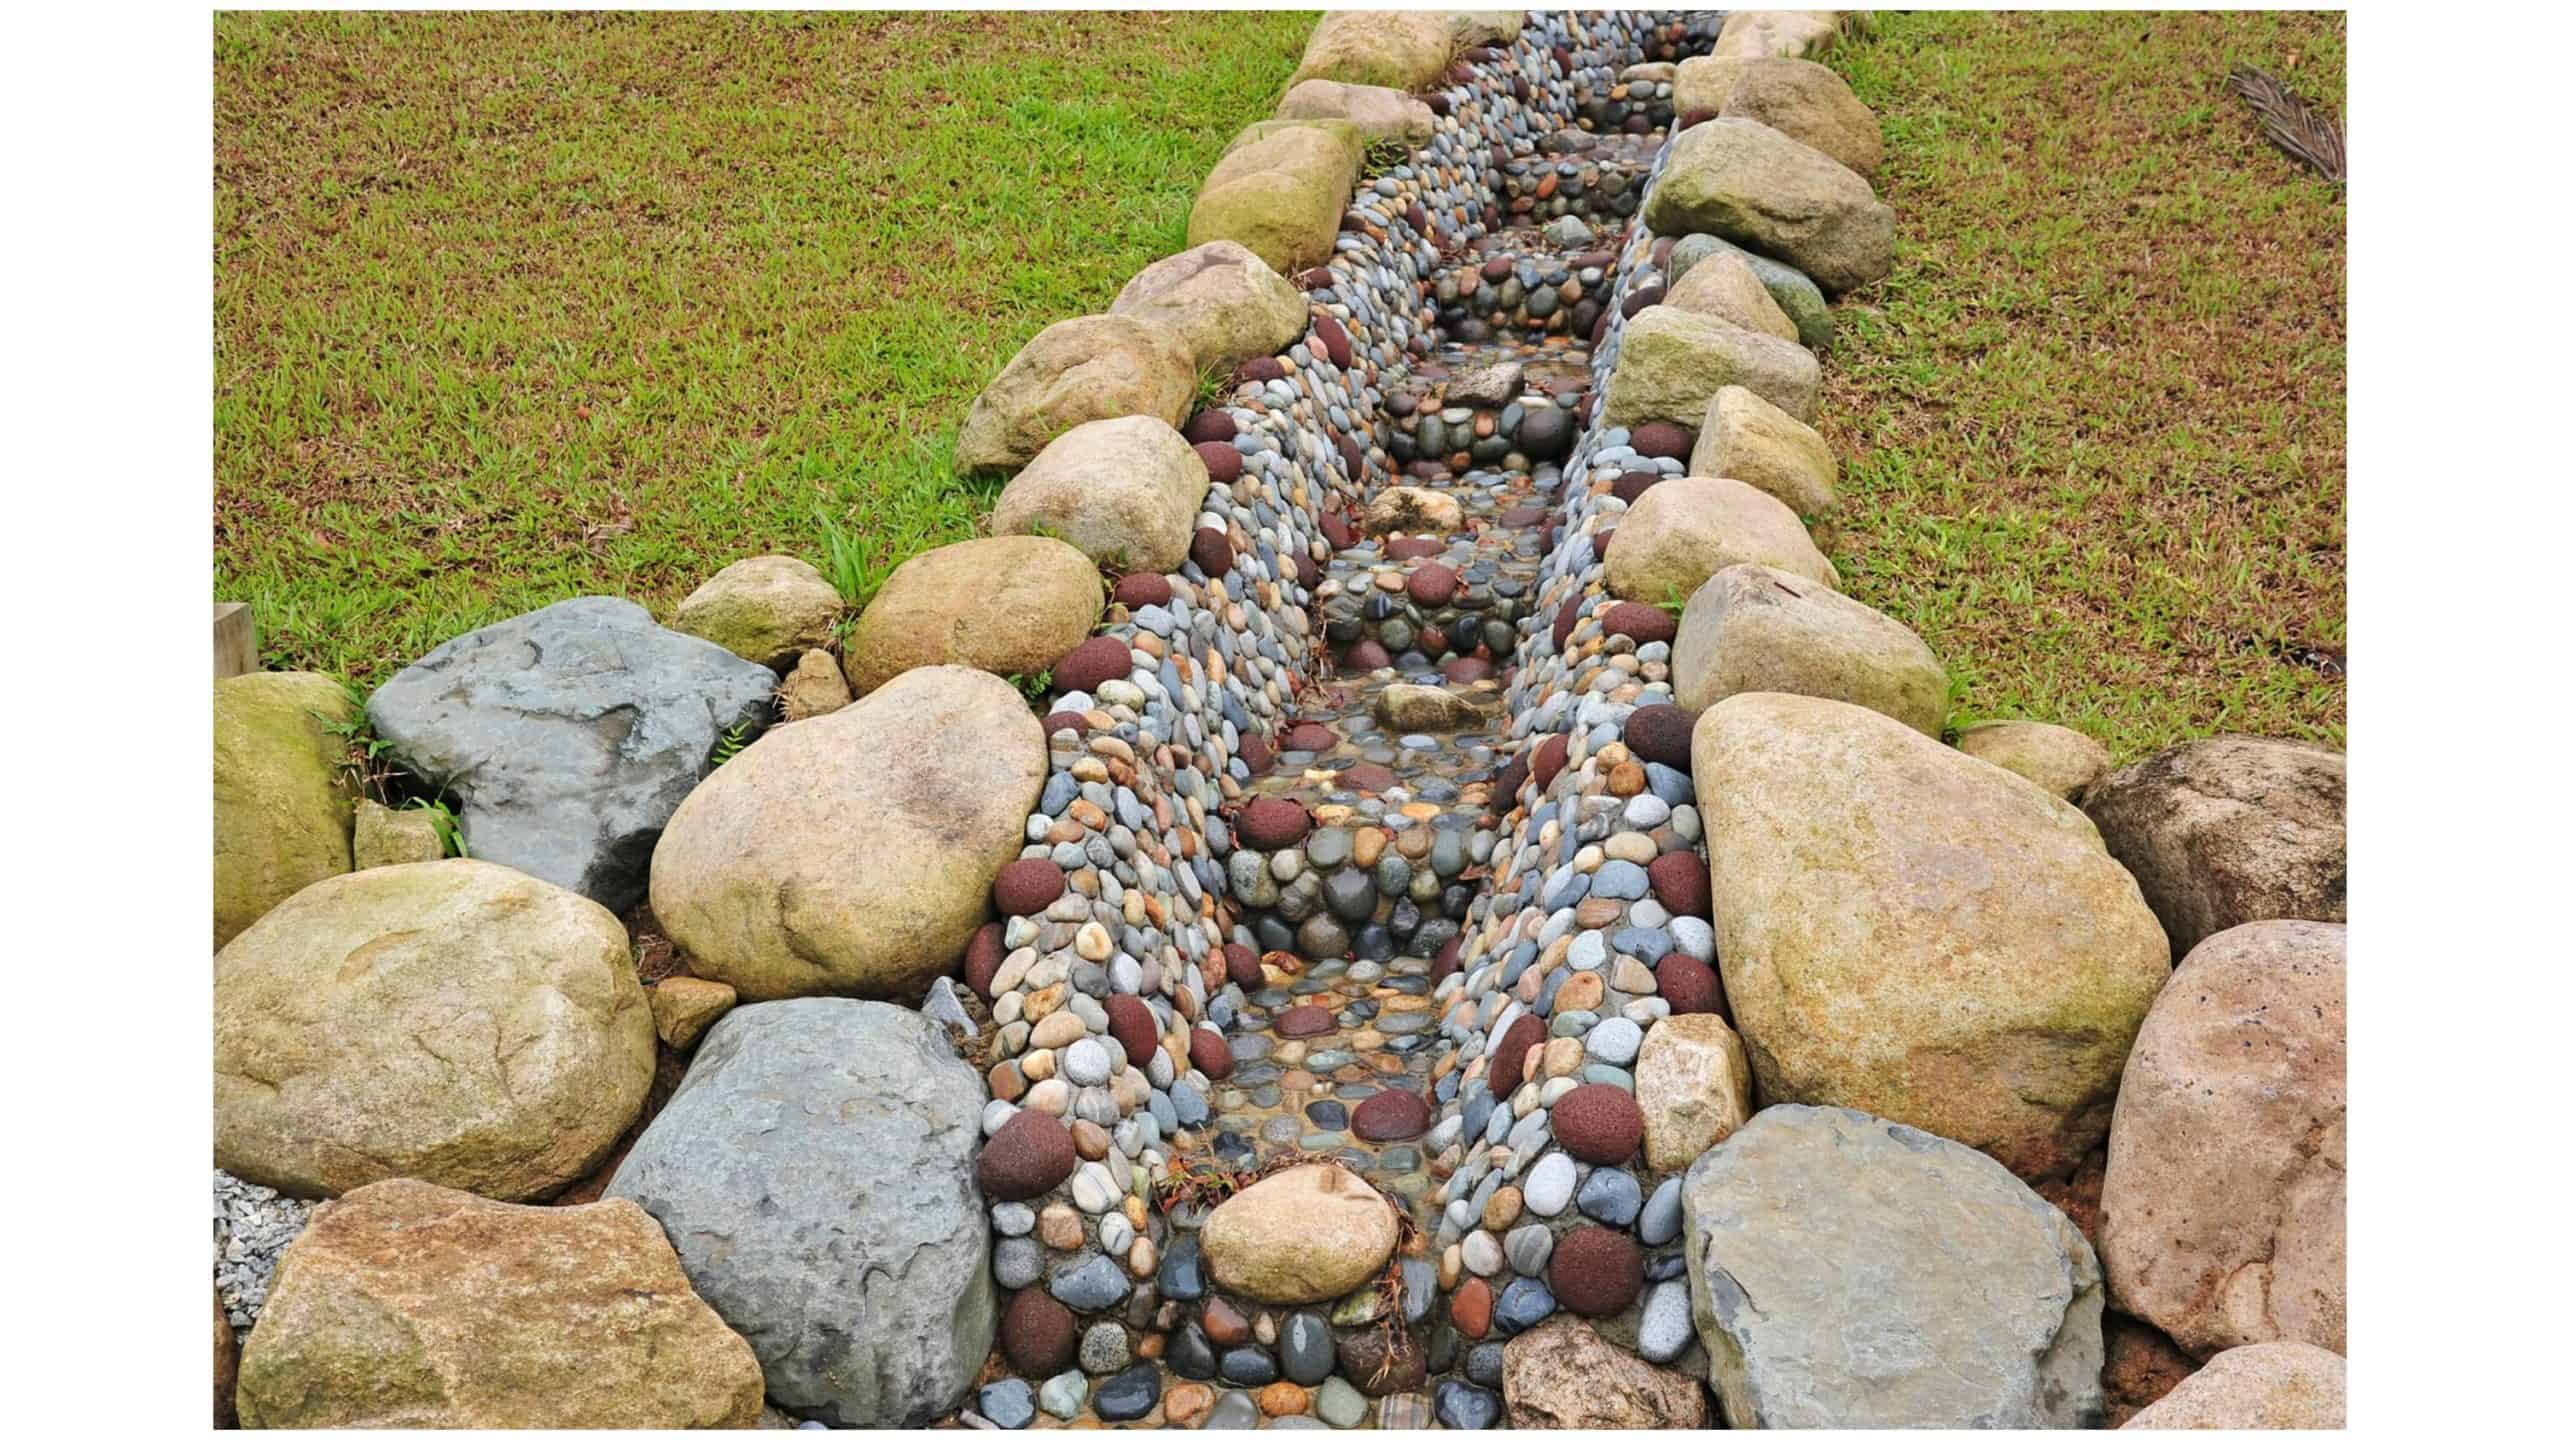
A French drain is a trench filled with rocks, gravel, and other materials to create an effective drainage system. Its purpose is to move unwanted water away from your property or garden area to prevent flooding and erosion. Unlike traditional drains, a French drain does not need any inlet or outlet pipes, as it relies on gravity and the natural porosity of its materials for drainage. This article discusses how to dig and install your French drain system properly.
Installing a French drain is one of the most effective ways to control water drainage from your yard or property. At the same time, it may seem like a lot of work, but digging for a French drain is relatively straightforward. Knowing how deep to dig for the installation is critical to ensuring that your French drain effectively keeps excess water away from your home.
How to dig a French drain?
- Step 1: Gather the necessary materials – shovel, gloves, bucket, drainage stone, or gravel.
- Step 2: Choose where you will be digging for your French drain. Ensure it is in a location that gets good drainage and is away from trees or other vegetation that might interfere with the drain’s functidrain’sep 3: Using string or stakes, Meadrain’sd maMeadrain’sdarea twice as wide as the depth you plan to dig — 8 inches deep by 3 feet wide.
- Step 4: Start by shoveling the trench along the perimeter of your marked area. Angle each side of the trench slightly towards its center so that water will naturally be pulled into it as it flows downward. Dig to a minimum depth of 8 inches.
- Step 5: As you’re digging, you should erect a shelf at the end of your trench by angling it upward several inches so water can flow more easily when needed. This is especially important if you use this French drain to control flooding in your yard or garden area.
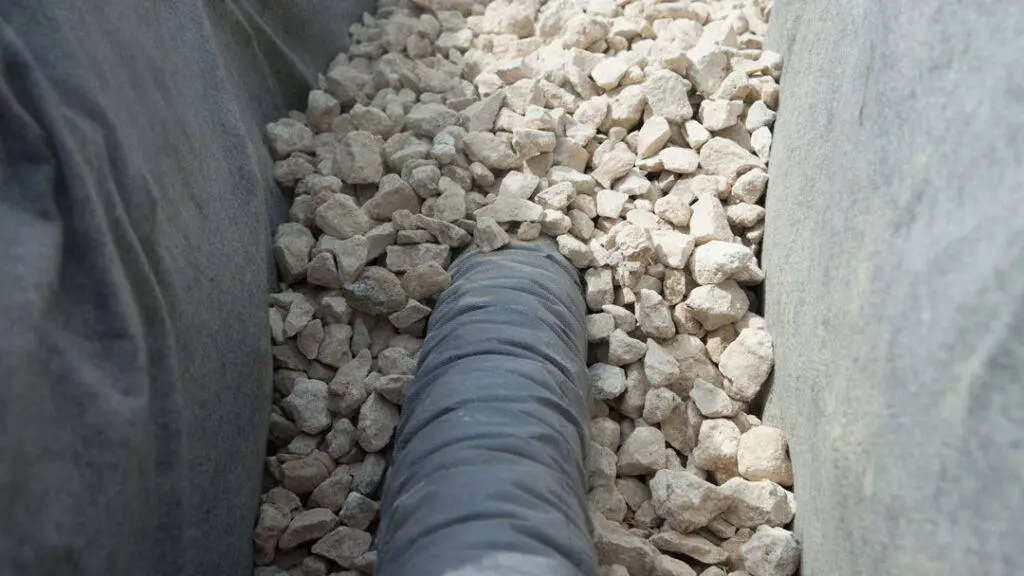
- Step 6: Once you’ve dug out your dirt and found any weeds or stones you may have encountered, lay down a layer of landscaping fabric across the soil at the bottom of your trench. This helps prevent weeds and debris from entering and clogging up your French drain system.
- Step 7: Place a drainage stone or gravel layer over the fabric lining to create a sturdy base for water to pass through freely without being blocked by soil particles and other debris. Depending on your depth, the Tren St entrench Savel is 8 inches below ground level at its lowest point (the most profound part). You may need additional layers on top if necessary, but make sure not to exceed 12 inches in depth if possible.
- Step 8: Refill any dirt removed from around the edges back into the areas around your French drain before gently packing them down so that they are firmly pressed against its sides for better support and stability when filled with water later on (make sure not to pack them too tightly otherwise water won’t be able won’t into itwon’tinally,itwon’tinallygrass seed overtop if desired for aesthetic reasons, making sure not to cover up any part of the drainage system itself!
Materials Needed:
The most important material needed for a successful French drain is gravel, which can be purchased from any local hardware store. You will also need a shovel or spade, rubber gloves for protection, plastic sheeting for wrapping the pipe (if using), small stones and sand mixture (to fill around the pipe), large rocks, filter fabric (optional), and PVC pipe if desired.
Planning & Preparation:
It’s always beIt’so plan when undertaking any DIY project, especially when digging a French drai, because you want to ensure it’s done corrit’sy. First, you should determine where you would like the drain placed in your house or garden area; this will determine how long you need the trench/drainage line and how deep it needs to go. Once you have mapped out your desired location, it’s time to sit digging!
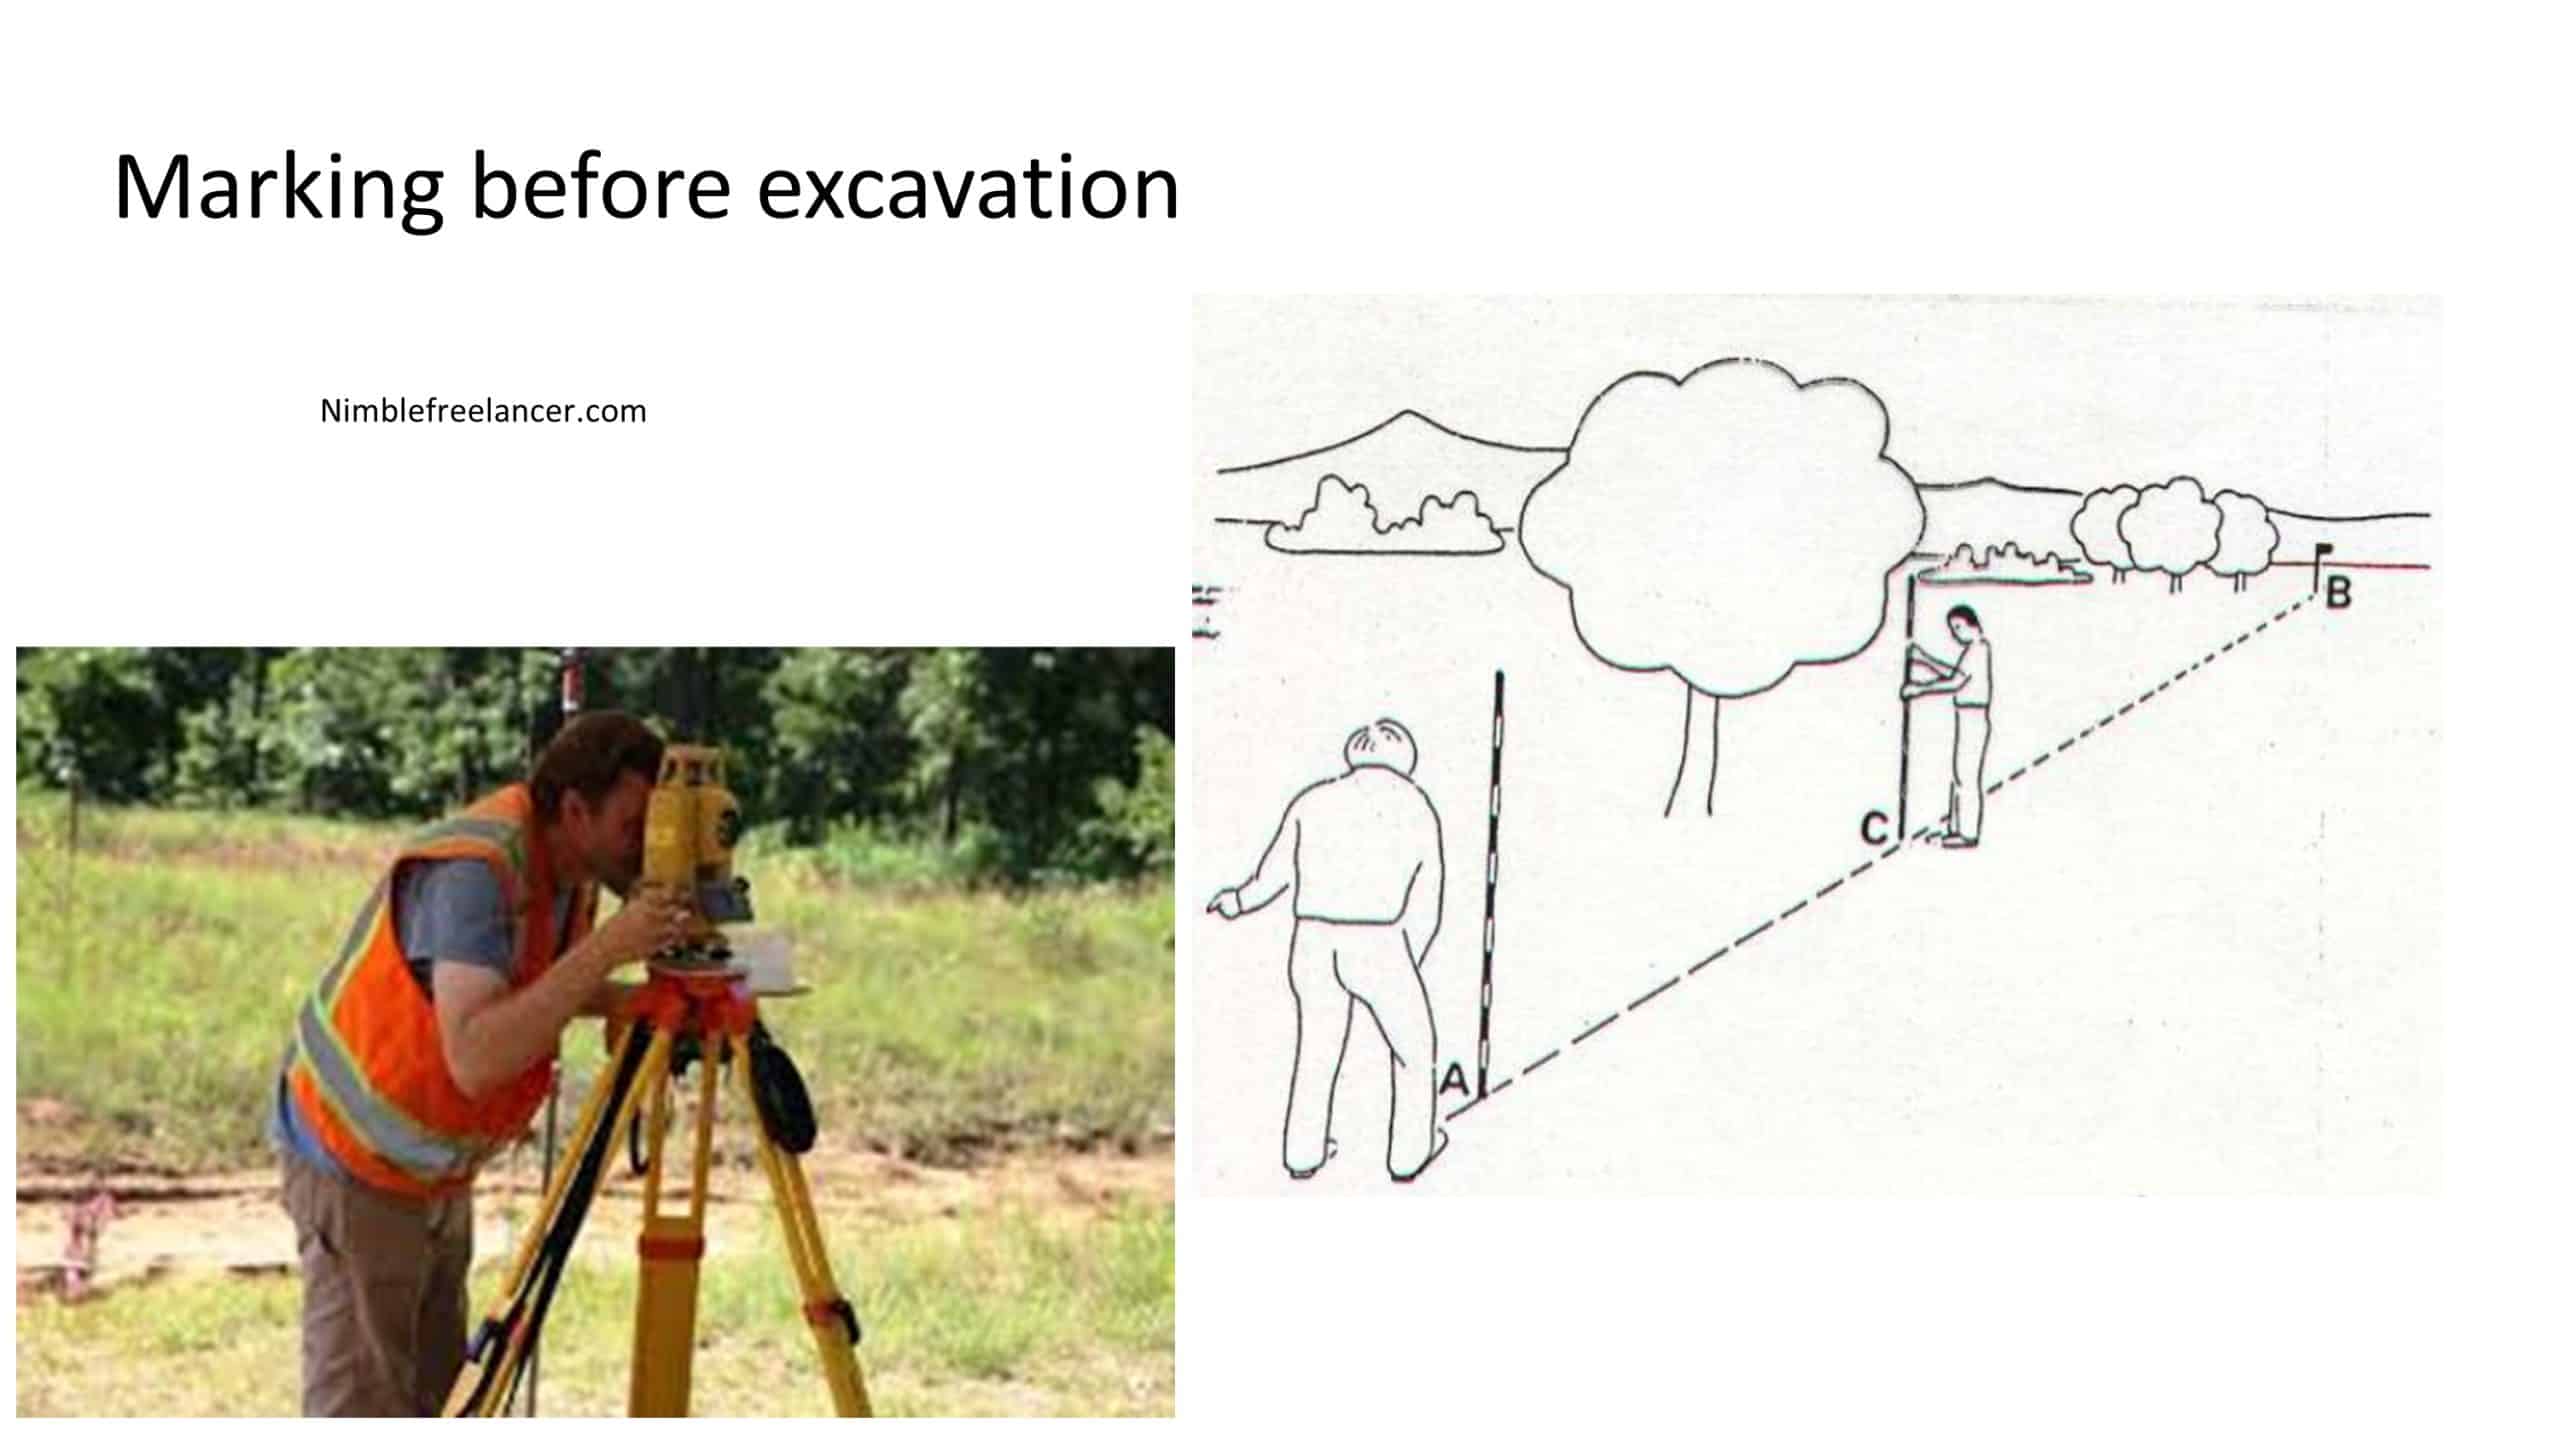
Yoit’sed to prYoit’sedols:
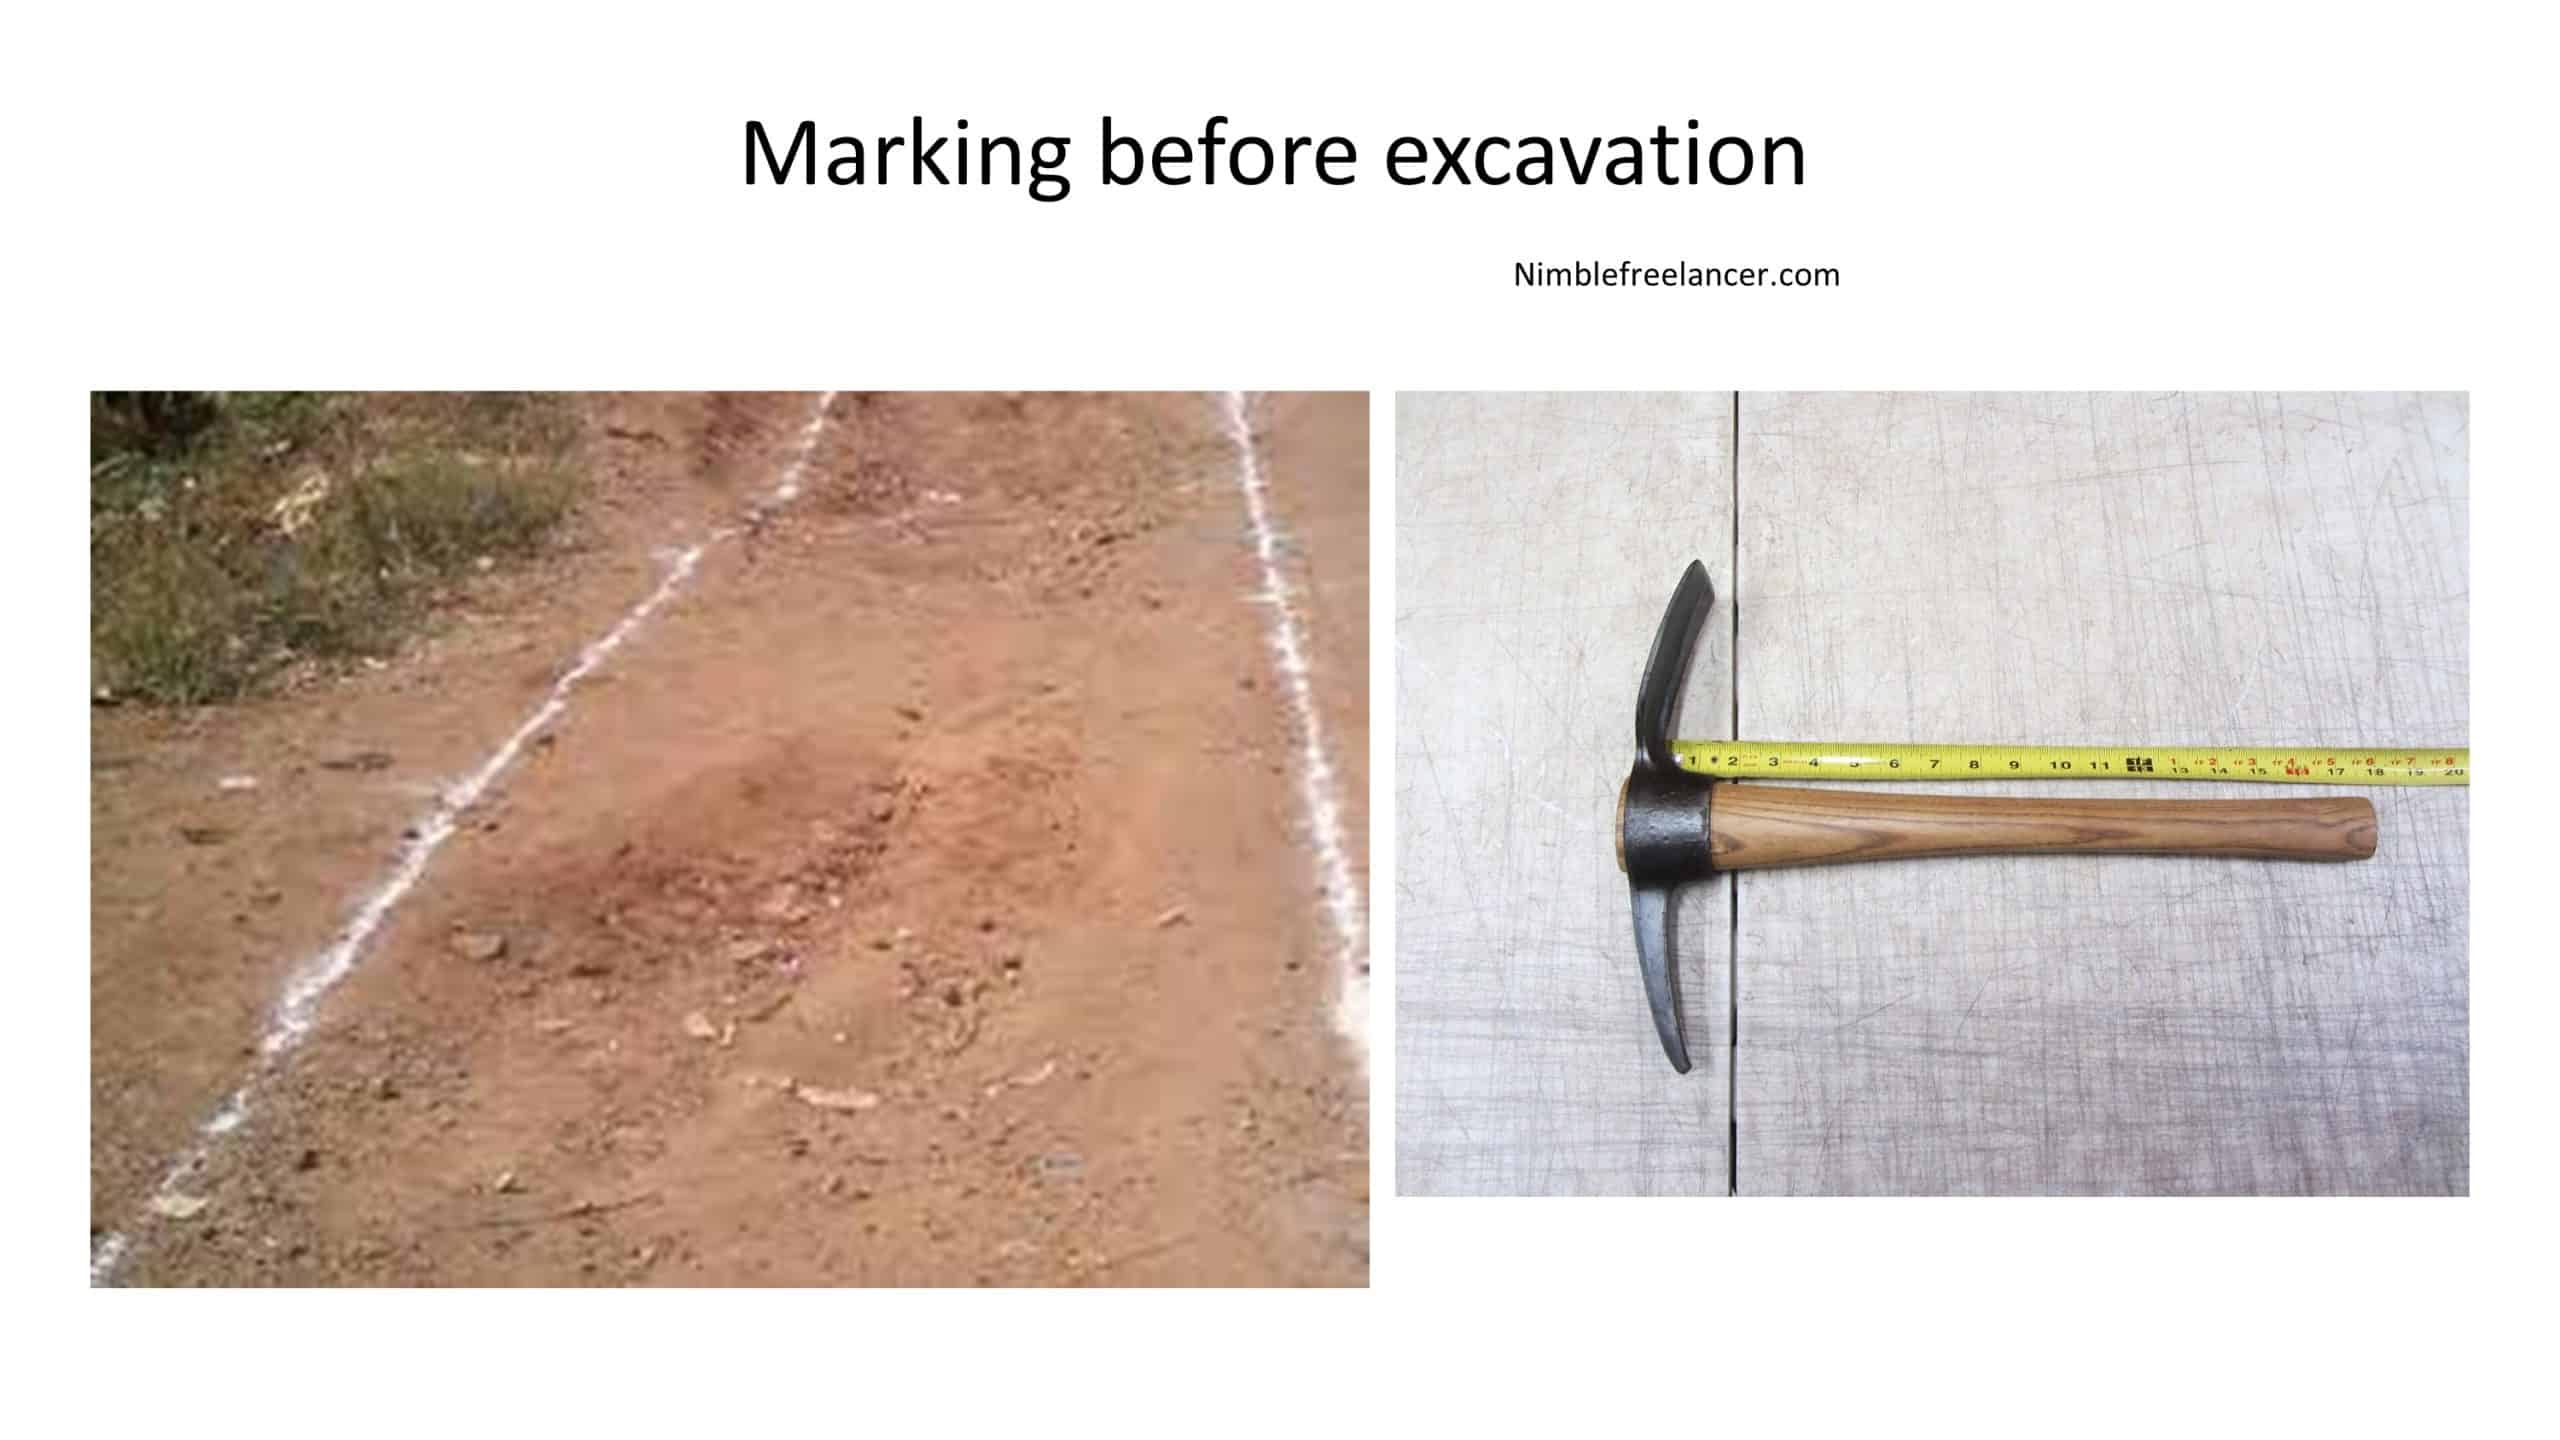

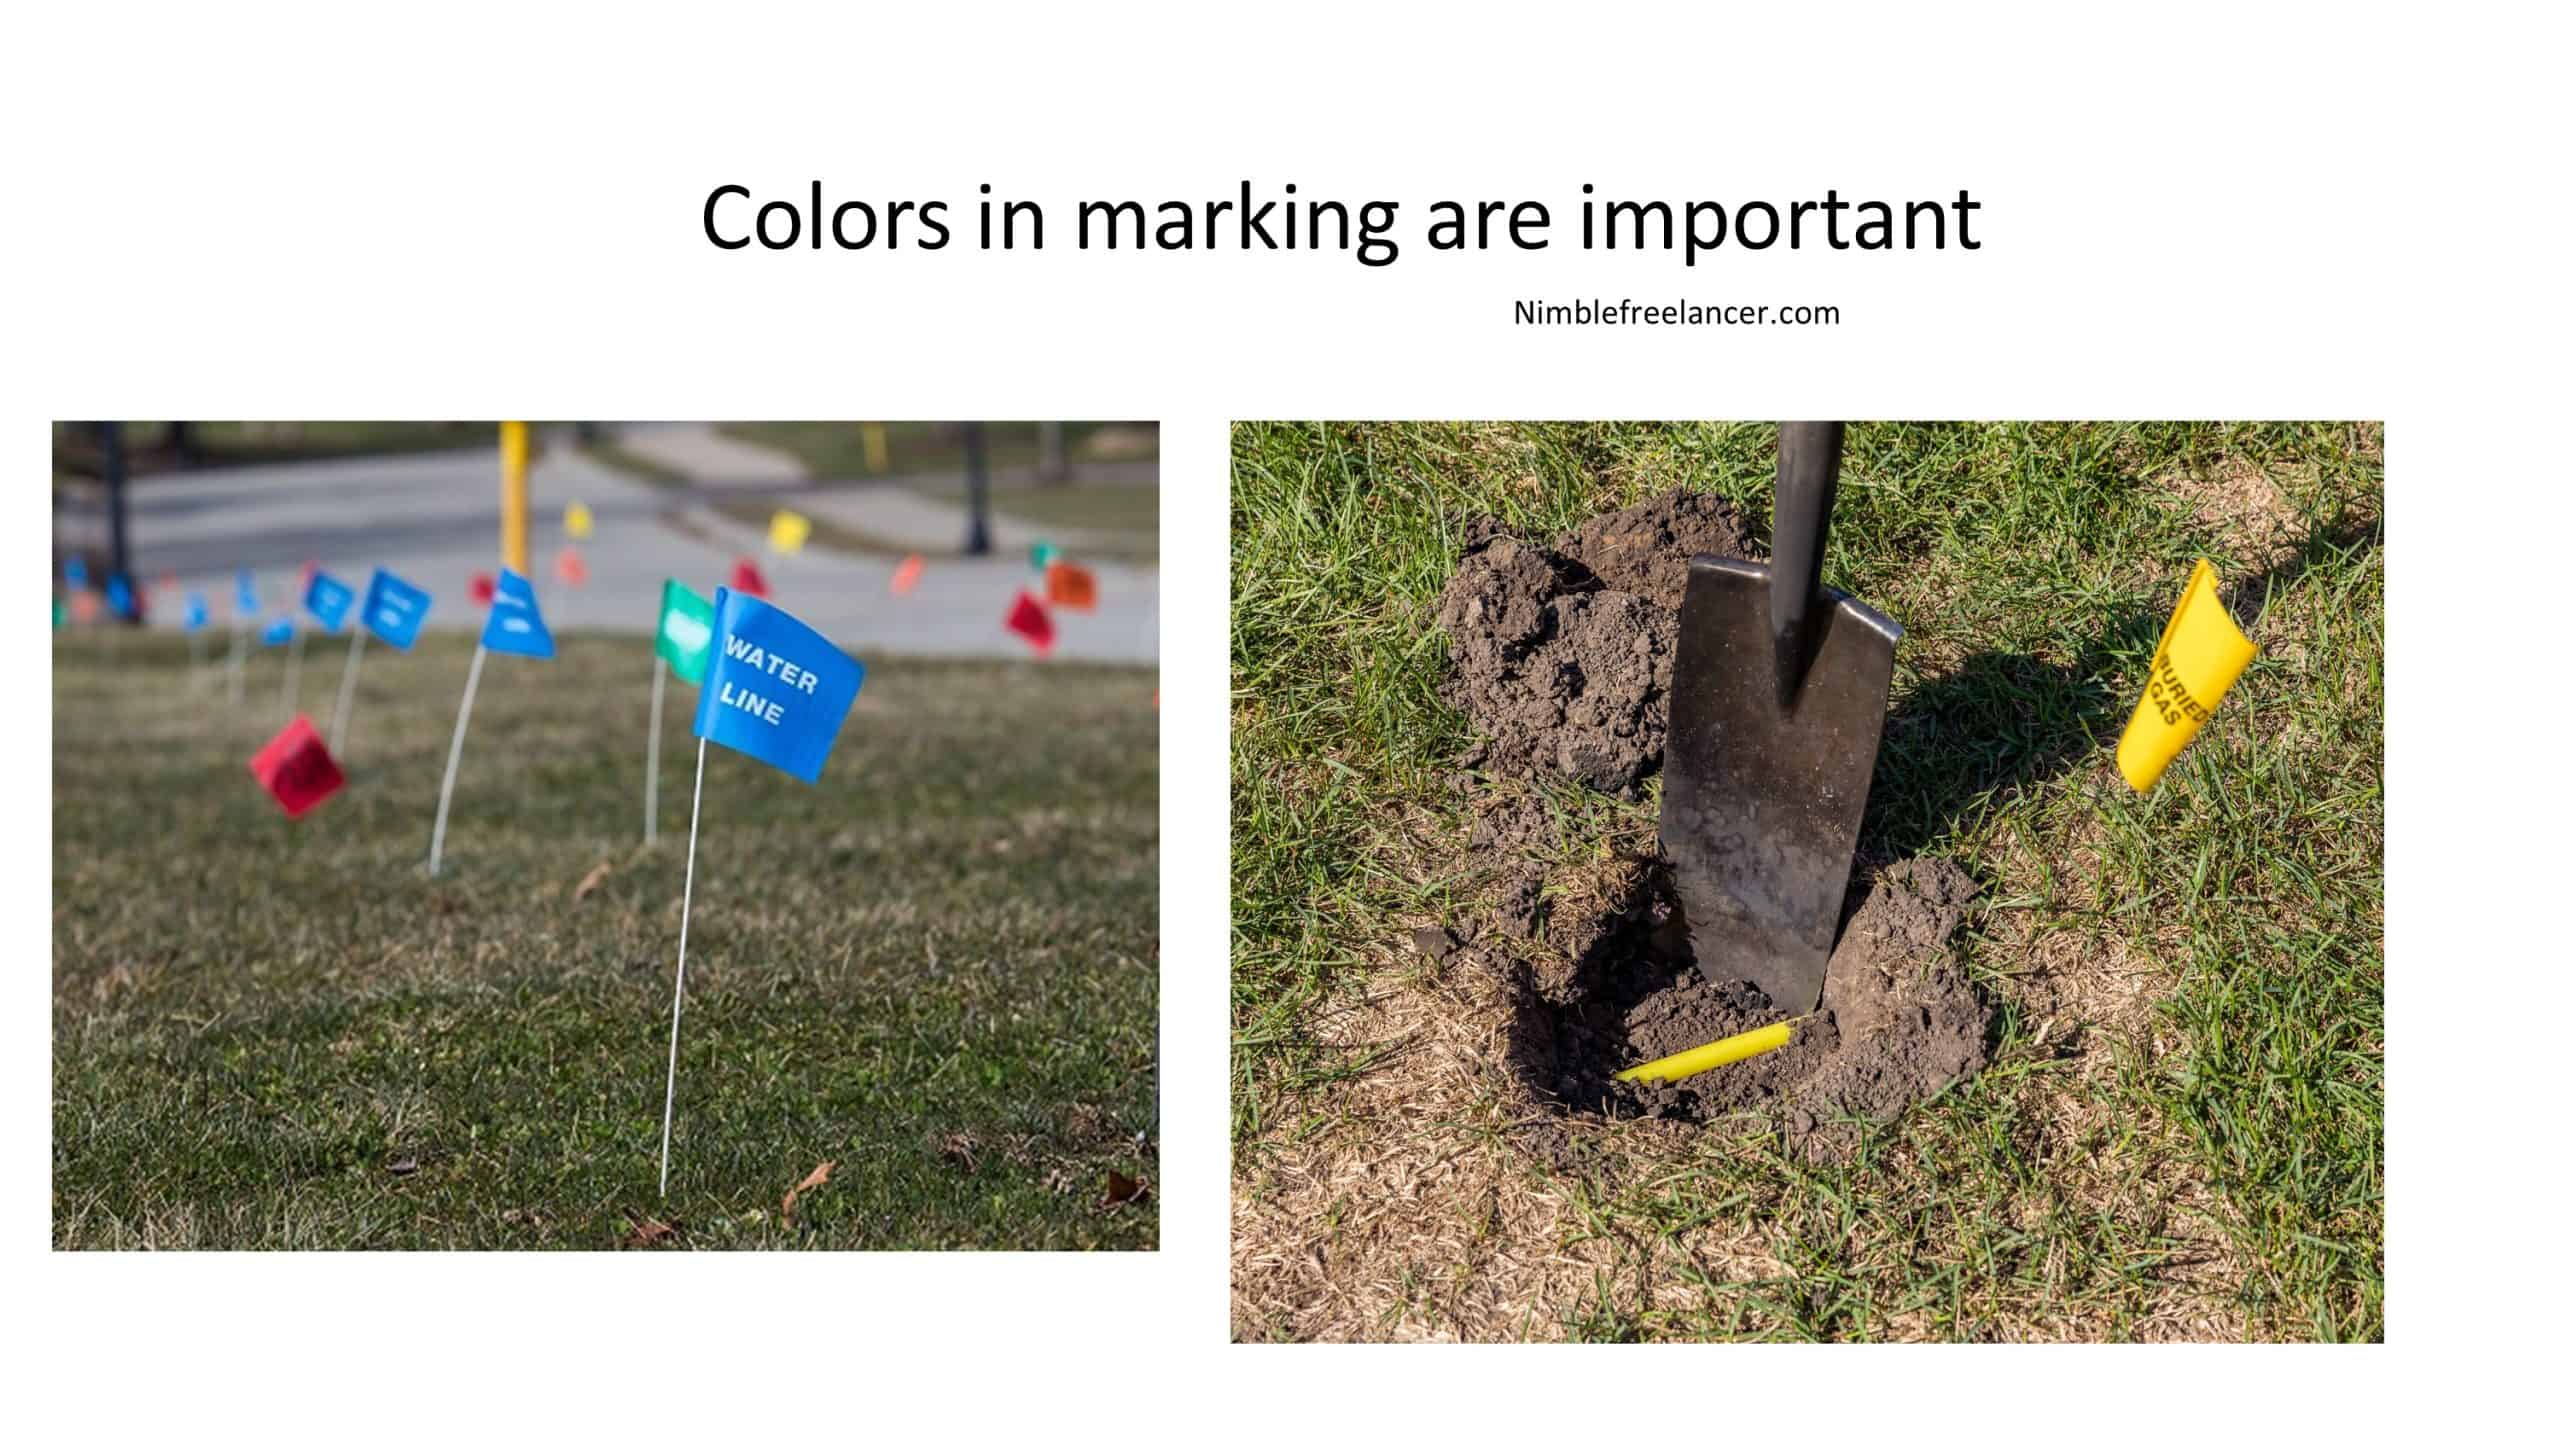
Colors for marking the area are:
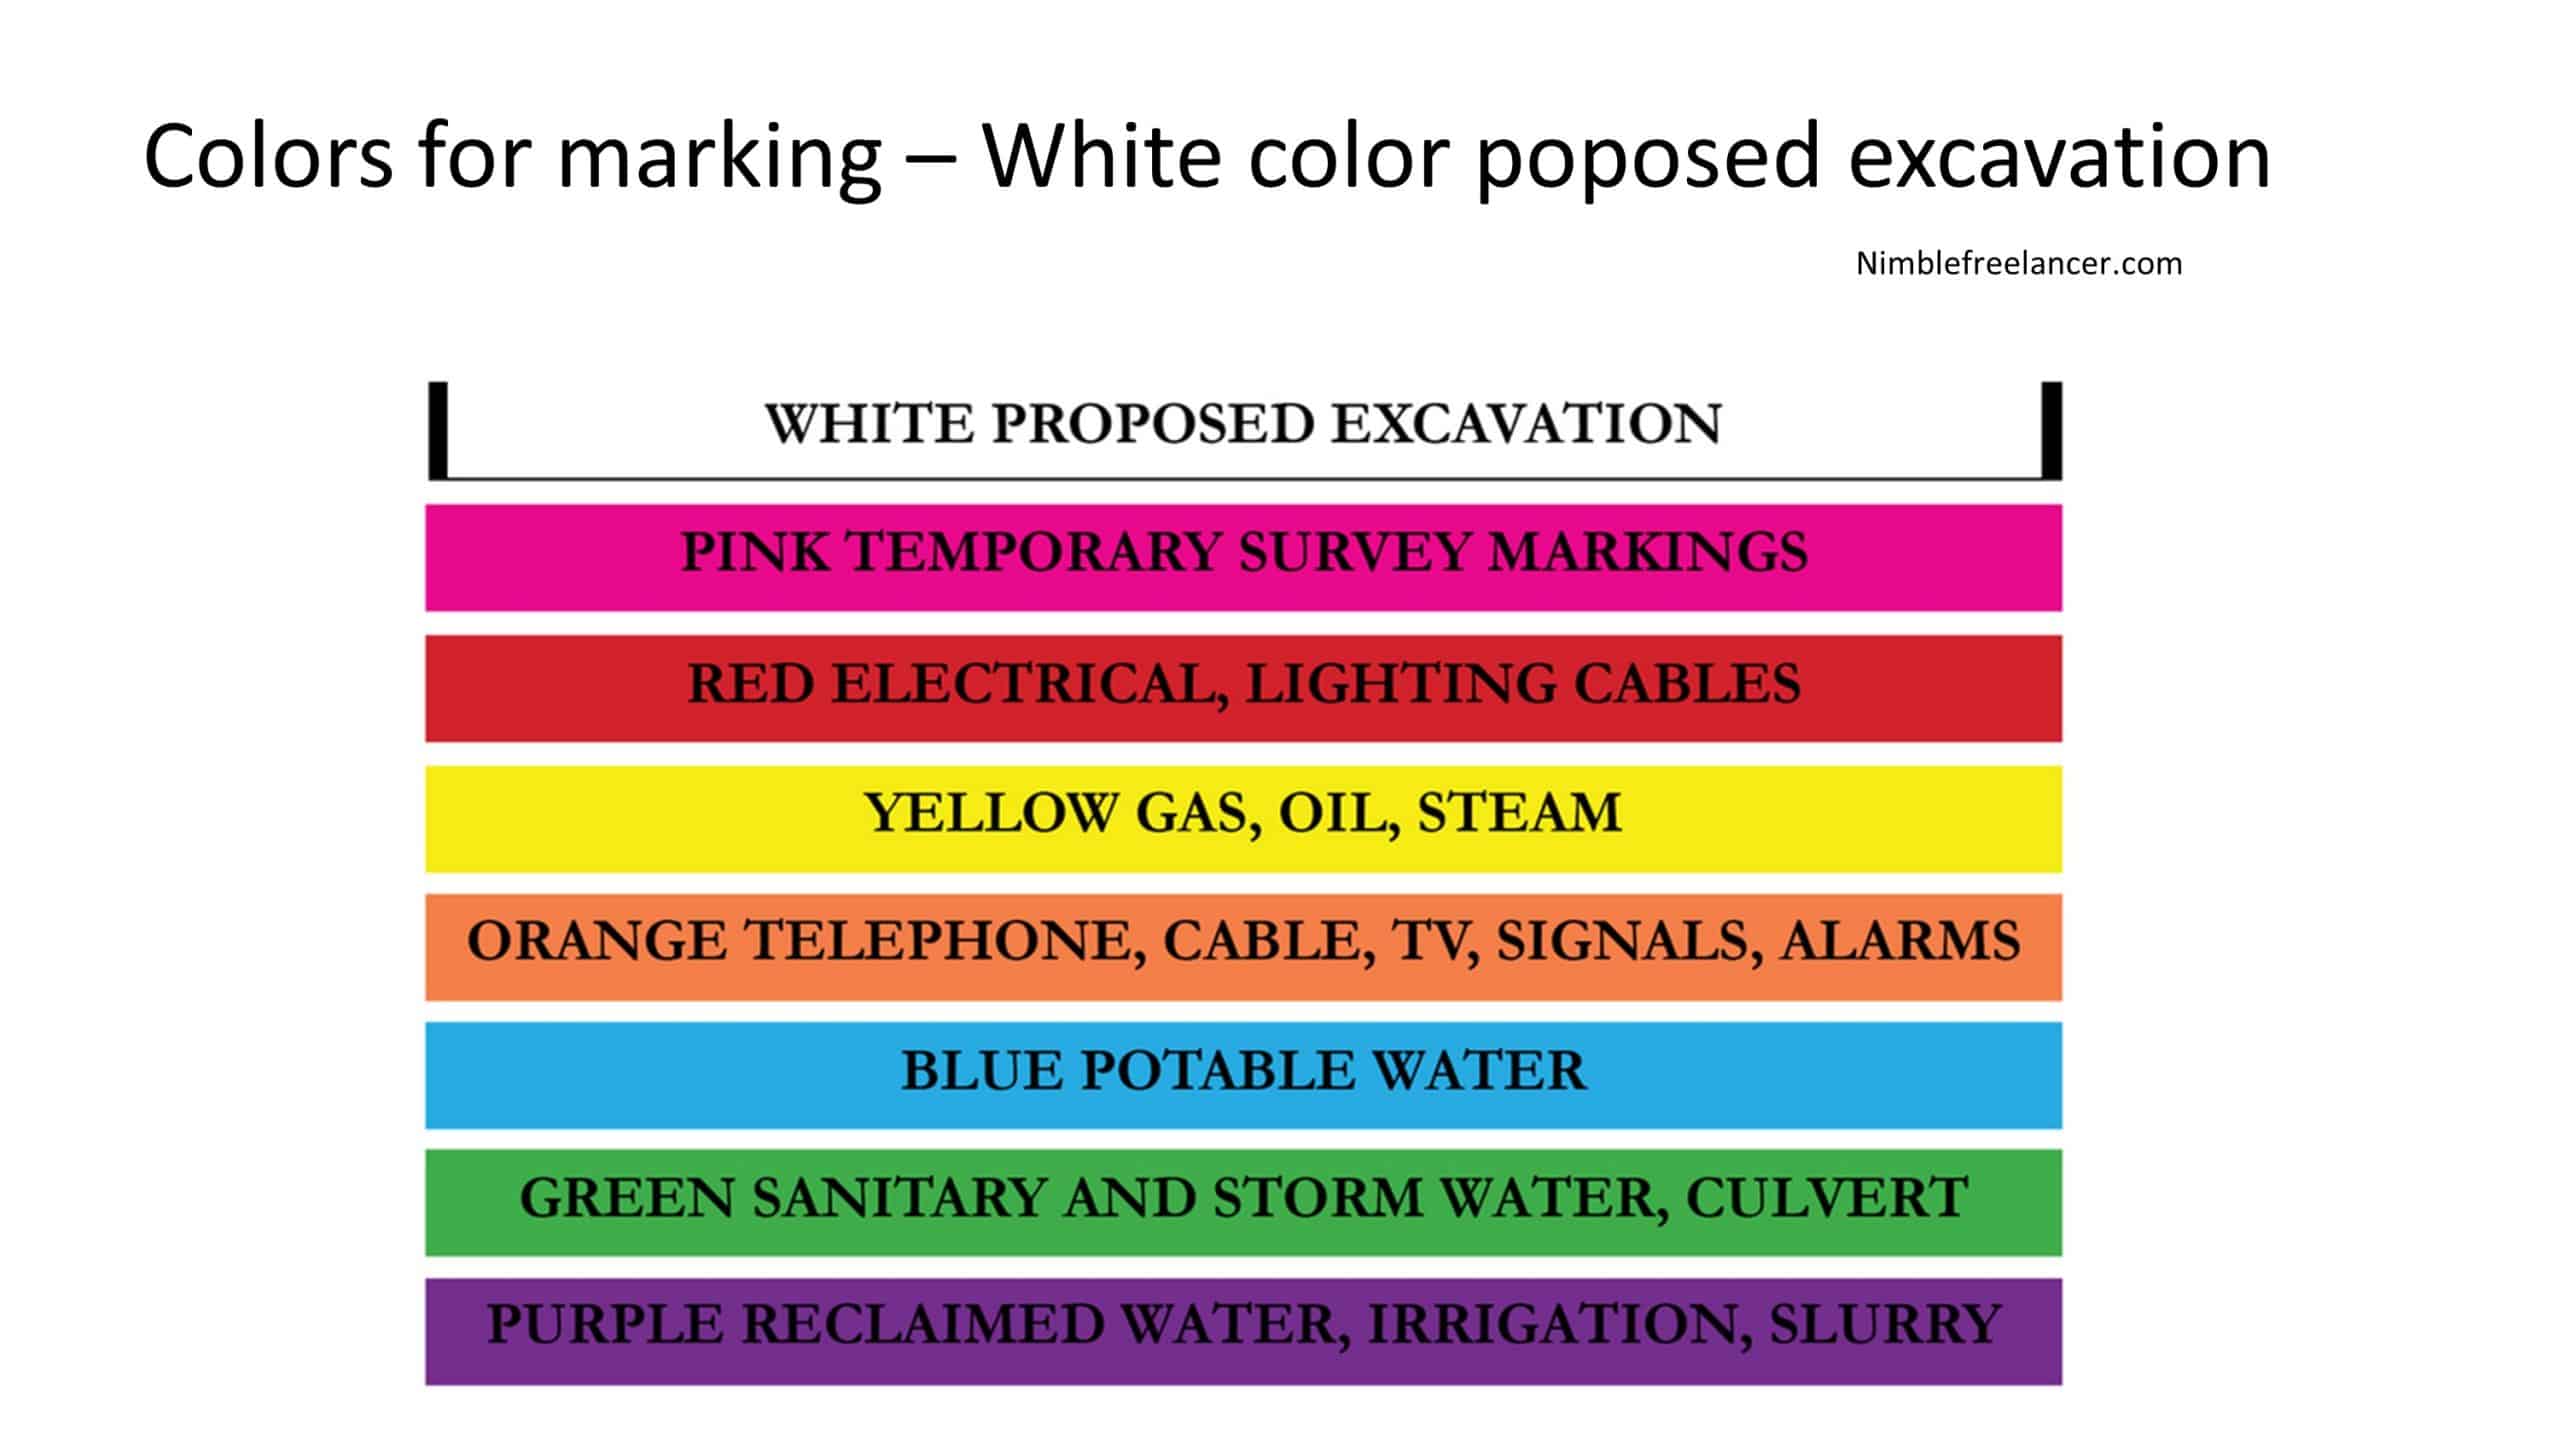
Do not make a mistake and cut the utility line :
Digging Your Trench:
Using your shovel or spade, begin digging your trench at least 6 inches wide and 6 inches deep along the desired path. Make sure that all sides are even so that water can flow freely throughout the entire length of the trench without pooling up in any one area. As you dig deeper into the ground, use larger rocks for support underneath each section so as not to cave in with heavier rainfalls later down the road. Continue digging until you reach an area where there is no longer water seeping up or pooling; this depth may vary depending on where you live, but generally speaking, 8-12 inches should do just fine!
Installing The Pipe & Filling In The Drain
Once your trench has been appropriately dug, it’s time to iit’sll whatever piping you use—PVC is usually best—and cover them with filter fabric if desired. Filter fabric helps keep dirt from clogging up your drainage line over time and ensures that only water passes through quickly; this helps ensure optimal efficiency for years to come! Now lay down some small stones over top of the filter fabric, followed by a layer of sand mixed with pea gravel before finally pouring about 3-4 inches of large rocks over everything else. This forms an effective barrier between soil particles that could clog up your drainage line later down the road! Lastly, if desired, wrap everything up with some plastic sheeting before moving on to Step 4… Testing!
Testing Your Drainage Line
Once everything has been installed correctly, it’s time to pit’st through soit’sesting! So it seems water into one end of your newly installed drainage line while keeping an eye out for any areas where water might be pooling up instead of flowing freely through its course—this could signify an issue with either installation or depth that needs attention right away in order avoid future problems down the road! If all goes well, congratulations—you’ve completed DIY. Should you dig for the French drain?
You should dig from 8 inches up to 3 feet deep. Remember first that the depth of the excavation of any drainage system depends on the depth of the foundation of the house and the amount of water it drains.
Before digging, call 811 and check the frost line by zip code.

From 2022 onwards, Mark has also been contributing author of home repair articles at nimblefreelancer.com.
Read more on Mark Brown's biography page.
Contact Mark: mark@nimblefreelancer.com