Nexus devices are great, but most devices purchased from carriers cannot be rooted without tripping an eFuse and being unable to receive OTA updates. Users commonly run into problems when rooting their devices after an OTA update. While many guides on root Marshmallow devices use tools such as SuperSU or Magisk, I will explain the steps in restoring the Bootloader (fast boot OEM lock).
The unlocked Nexus device is probably the best piece of hardware someone could own. The developer edition has a bootloader that can be easily unlocked and allows custom ROMS to be flashed. The Nexus line is the direct descendant of Google’s Android smartphone program. It features devices that run vanilla Android and offers a variety of customization options. Because of this, the Nexus devices are straightforward to root and modify so that we will cover all the different methods in detail.
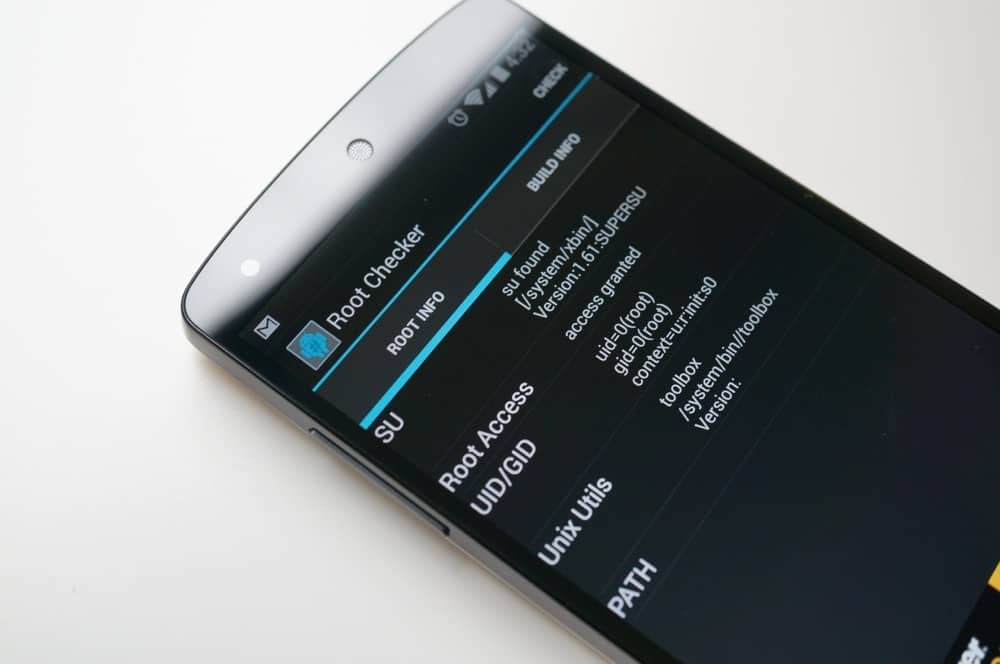
Rooting can be intimidating for people unfamiliar with Android hacking. So here is a quick step-by-step guide on how to root a Nexus 5


How To Root Nexus 5?
- Turn off your Nexus 5 phone.
- Press the “Volume Down” and “Power” buttons simultaneously.
- Wait to see how Nexus 5 reboots into the bootloader mode.
- To root Nexus 5, double-click on root windows. bat in the CF-Root folder
The Nexus 5 is a great phone, but you’ll want to root if you’ll get the most out of it. Rooting your phone gives you superuser privileges to modify system-level applications and functions.
The first thing you’ll need to do is make sure your device has Developer Options enabled. You can do this by going into Settings > About phone and tapping the Build Number seven times. Your screen will tell you when Developer Options have been enabled. Once that’s done, go back into Settings > Developer Options and check the box next to “USB Debugging.” Doing this will let your computer send code to your phone so that it can be rooted.
Next, download the Android SDK (Software Development Kit) on your computer. It’s free and can be found on Google’s developer site. Opening the SDK for the first time will ask you what packages you want to install. Select “Android SDK Platform-tools” and click Install packages at the bottom of the list. Doing this may take a few minutes, so leave it alone.
How To Unlock Nexus 5x Bootloader?
Unlocking the Nexus 5x Bootloader is easy, but a phone will reboot and lose data. Below are further instructions on how to unlock the Nexus 5X bootloader:
Newer versions of Android have made it more challenging than ever to unlock a Nexus using a fast boot. Once you’ve completed the process, you’ll have to enable developer options, which will show up in Settings > About phone, and enable USB debugging from within that menu.
When that’s done, download the latest version of the Android SDK from Google and install it on your computer. The OEM USB drivers will also be helpful if you’re on Windows and need access to fast boot or ADB to unlock your phone. Doing this is a quick guide for doing just that, but we recommend reading our complete guide before continuing as there are some extra steps for Windows users. After the reboot, you can still use the phone, but you’ll have to set it up as if it were a new device. You will need a computer to run the commands.
How To Open Nexus 6p?
With the Nexus 6p, a person can easily unlock a phone and access apps. A person will need a fingerprint.
To set up your fingerprint scanner, go to settings in the menu bar. Select security, then scroll down and select “Nexus Imprint.” If you haven’t already set up a password or PIN for your phone, you’ll need to do that when you choose “Nexus Imprint.”
You’ll be prompted to add a fingerprint once you’ve entered your password or PIN. It’s a simple process: first, use the on-screen guide to line up your finger with the sensor on the back of the phone below the camera lens. Then, swipe it across once slowly and carefully. You’ll have to do this several times to ensure the scanner has multiple samples of what your finger looks like. Once you’ve added at least one Fingerprint, go back into settings and select Fingerprint Fingerprintity if you want to add more. Then click Add Fingerprint at the bottom of the screen and repeat these fingerprints to the new Fingerprint you’d like to add.
How To Connect Nexus 5x To Fingerprintect a Nexus 5x to a PC, a person can use a USB cable. To begin, locate the small hole at the top of the Nexus 5x. Such is where the headphone port is located.
Insert a thin tool, like a paperclip, into the headphone port and depress the inside button. The small button will release a tray on the side of your phone, which you can use to insert your SIM card or a microSD card.
After you’ve inserted your SIM card or MicroSD card, please take out your USB cable and plug it into an empty USB slot on your computer. Then, plug the other end of the USB cable into an open USB slot on your Nexus 5x while still plugging the other end into your computer.
You should now see a prompt on your Nexus 5x asking how you want to connect it to your PC. Select “Transfer Files” from this menu. You’re all done! This method allows you to quickly transfer files between your computer and Nexus 5x.
What Is Restart Bootloader?
A bootloader is responsible for loading the operating system. Think of a Bootloader as a bridge carrying a device’s software from one place to another.

If a bootloader fails to load an operating system, your device won’t be able to launch. Restarting the Bootloader can help you fix software-related issues and maintain your device’s performance level. You can restart the Bootloader on your Android phone by turning off your phone and holding the power switch until the Bootloader menu is seen.
To learn more about restarting the Bootloader, check the [article] for detailed instructions and tips on how to do so on your Android phone.
How To Root Nexus 7 Without Pc?
Android devices can be rooted without a PC. This method works on devices with Google Play installed.
You need to download the TWRP recovery tool and install it on your device. Make sure your device is unlocked with the Bootloader. Google is a search engine company that makes Nexus tablets. Google sells Nexus tablets under the brand name “Google.” Google makes the hardware, software, and web services. They make Nexus 7 tablets with Android 4.1 (Jelly Bean).
How To Transfer Files From Nexus 5 To Pc?
If you want to transfer files from a Nexus 5 to a PC, there are different methods. Read on.
- If you’re running Windows 8 or higher:
- Connect your phone to your computer with a USB cable. If you haven’t already done so, you’ll be prompted to install some phone drivers. Once this process is finished, you should see a notification on the bottom right of your screen that says, “Device driver software installed successfully.”
- At this point, the phone should show up in Windows Explorer as a new drive with your device’s name. Double-click on it and navigate where the file(s) you want to transfer are.
- Right-click on each file and select Copy from the menu.
- Navigate to the location on your PC where you want to store these files, right-click in the space, and select Paste from the menu that pops up.
The Nexus 5 is a smartphone manufactured by LG and sold under the Google subsidiary, Nexus. Users can store data in their internal memory or use an optional microSD card as portable storage. Transferring files from your Nexus 5 smartphone to your personal computer is relatively easy. Still, the steps you need to take will vary depending on your operating system.
How Do I Reset My Nexus 7 Without A Password?
A person may want to sell the Nexus 7, return the device to the store, or enjoy a fresh start. The Nexus 7 can be reset with just simple steps:
- Turn off the tablet completely. Hold the Power switch/button until a message asks if you want to shut down your device if it’s already locked. Tap OK and wait for the screen to go black.
- Turn on your Nexus 7 while pressing and holding both the Vol Up + Vol Down + Power buttons simultaneously, and after seeing a menu appear, release all 3 (three) buttons. You should be in Fastboot mode now.
- Use the Vol Down key to scroll to Recovery mode (the one with a bit of Android icon). Press/hit the Power switch/button to select Recovery mode. Another screen will show an exclamation point inside a red triangle; press & hold power, press Vol Up once, and release both buttons. You should see a menu now.
- Use the Volume keys to highlight “wipe data or factory reset” and press Power to select it. Next, highlight “Yes — delete all user data” and press Power again to confirm your choice. Once finished, use the Volume keys to highlight “reboot system now” and tap Power one last time to reboot back into your standard Android OS.
How Do I Factory Reset A Nexus 5?
Performing a factory reboot/reset on a Nexus 5 is easy but confusing if you have never done it before. Below are instructions for performing a factory reboot/reset on a Nexus 5, followed by a step-by-step walk-through.
If you’re selling your Nexus 5 or trying to fix a problem, you may have considered resetting your device. First, ensure your phone is fully charged and has backed up all your data before resetting. Then, go into Settings > Backup & Reset and select “Factory Data Reboot/Reset.” You’ll see a warning about what happens when you perform this action: all your data will be erased from the device and revert to its original state (as if you’d just taken it out of the box). After reading this warning, press “Reset Phone” at the bottom of the screen. You’ll be prompted for one final confirmation before the process begins. Once confirmed again, please sit back and let your phone do its thing! It should take about 10 minutes, depending on how much data has been stored there.
How Do I Unfreeze My Google Nexus 7?
When the Nexus 7 freezes, do not despair. The first thing to check is whether the tablet is frozen or if the screen isn’t working.
Try pressing and holding the sleep/wake button for about 10 seconds. If you don’t see the screen go black, it’s not in sleep mode, and the problem may be with the screen instead of the software. If it does go blank, your tablet is probably frozen, and you’ll need to restart it through a “soft reset.” That involves pressing and holding down three buttons: the Volume down button, the power switch/button, and the home button. Hold all three for about 10 seconds until the word “Google” is seen on your display. Let all 3 (three) buttons go, and wait a few momentsVolume your device restarts. Should this fail to work on your Google Nexus 7, you’ll need to reset it through its bootloader menu.
How To Fix The Boot Loop Mode On Nexus 6P?
To fix the Nexus 6P boot loop problem, force-boot the device by pressing both the power and volume-down buttons simultaneously.
Another way is to remove the device’s battery and insert it back into the slot after several seconds. Both methods force the phone to shut down and turn on again immediately. The recovery mode then runs and fixes any problems detected.
The boot loop issue is widely spread, affecting thousands of Nexus 6P users. Such a crisis will continue to haunt Google and Huawei unless they do something about it immediately. The problem is caused by the battery swelling and pressing against the microphone design flaw. At first, the issue was considered restricted to those using a third-party charger. Now, Google has said that the problem lies with other accessories. Even Pixel phones are seemingly affected by this problem.
How Do I Fix Nexus 6p Stuck On Google Logo?
A common issue for Nexus 6p users is the device getting stuck on the Google Logo. Luckily, there are things a person can try to fix without seeking professional help.
Note: You may have to remove your battery to complete these steps.
- If your phone is still on, turn it off
- Please wait at least 30 seconds before turning it back on
- Press & hold the Power switch & Volume Down button for about 15 seconds. Such should take you to Fastboot mode.
- Navigate using the Volume Up or Volume Down buttons, and press Power to make a selection.
- Use the Volume Down button to selVolumecovery Mode and press Power
- When you see an image of an Android robot with a red exclamation Volumehold down the Power switch & then tap Volume Up once. Such should take you to Recovery mode.
- Use the volume buttons to scroll down, then press power to select Wipe data or factory reset.
- Scroll down and use the Power switch/button to select Volumedelete all user data.
- When this has been completed, scroll down and use the Power switch/button to select Reboot system.
How Do I Flash A Nexus 6p?
A person must find the right tool and instructions to flash such a device. Let’s dive into how to flash the Nexus 6p today!
If you’ve been searching for a way to flash your Nexus 6p, it cannot be obvious to understand. The good news is that this process is simple.
- Download and install the SDK Platform-Tools package for Windows, Mac, or Linux.
- Enable USB debugging on your Nexus 6p.
- Connect your phone to your computer using the USB cable that comes with it.
- Open a command line and navigate (cd) to the directory where you downloaded the Platform-Tools package, then run “ADB reboot bootloader” (without quotes).
- You can use fast boot commands in your command line to flash factory images to your phone.
How Do I Fix My Android? It won’t Boot Into Recovery.
If an Android device does not boot into the recovery option/mode, there are different things a person can try to fix such an issue. Continue to read below.
- Turn off the device and remove the battery, if possible. Wait 10 seconds before returning the battery, then attempt to boot into recovery mode.
- Turn off the device and remove the SD card, if possible. Wait 10 seconds before returning the SD card and attempting to boot into recovery mode.
Using a Key Combination
- Turn off your Android device.
- Use the buttons or touch screen to get to the Recovery Mode screen.
- Once you see the Recovery Mode screen, use your volume buttons to navigate the menus.
- Once you are done, select “Reboot” and wait for your device to reboot normally.
Does Nexus 5 Still Get Updates?
No matter the version of Android installed on the Nexus, there is a good chance the operating system will be updated with the newest version of Android if the device can handle the update.
Android Marshmallow was released in October 2015, and the Nexus 5 was released in 2013. Even though it is an older device, it is still a Google flagship. Like many consumers today, you want to know if your Nexus 5 will continue to receive updates. Marshmallow is one of the newest versions of Android available today. However, not every phone or tablet can run this new operating system. You can find out if your device supports Marshmallow by quickly searching online. It will tell you if there are any updates available for your device. You may have to wait several months to see an update on your phone or tablet. Even though it has been a long time since Marshmallow was released, there is still a good chance that Google will release an update for it in the future.
How do I know if my Nexus 5 is up to date?
To check if a Nexus 5 is running the latest version of Android, go to Settings > About phone> System Updates on the device. There, you can see the version of Android currently running and whether or not a new update is available.
If you don’t see an update available now, that doesn’t necessarily mean everything is fine with your device. It’s also possible that something went wrong, and you didn’t receive the most recent update, so check back every few weeks just in case!
How Do I Reinstall Android On Nexus 5?
There are multiple ways to reinstall Android on Nexus 5. If a person is having trouble with Nexus 5, reinstall Android by following steps:
- Go to the Google Nexus website and download the latest factory image for your device.
- Unzip the factory image file into a new folder on your computer.
- Open a command window on your computer and navigate to the folder with the unzipped files.
- Please turn off your device and reboot it into bootloader mode by holding down Volume Down while powering it back on.
- Connect your device to your computer using a USB cable.
- Type in flash-all.bat (Windows) or flash-all. Sh (Mac) and press enter to run the script that installs AndrVolumeon your device.
When that’s done, reboot normally, and you should be ready!
Conclusion
Based on the given parameters, it can be no surprise that Android-rooted and unlocked devices are becoming more popular today. Unlocking the Bootloader and rooting is possible in two ways on phones. The critical prerequisite in both methods is to create a backup of all data on the phone, as unlocking the Bootloader will wipe out data currently on the phone.
The Nexus phones are the favorite of the Android community. Some people root their phones because they want to add or edit things, and others do it because they want complete control over their devices. There are many guides on the internet for these devices, and we have posted a few to help you if you are stuck.
Many Android users out there want to root their devices to access all the features. Rooting your Android device lets you unleash the power of your phone, like a custom recovery that enables you to flash anything to the device and flash it properly without boot loops or corruption. Rooting or unlocking a device makes it easier and faster to do various tasks that normal users would never consider doing.


Learn more about authors in Nimblefreelancer's team biography page.
- 6 Proven Ways SaaS Founders Actually Get Customers (With Real Examples) - December 17, 2025
- Facebook Ads to Get Followers! - December 27, 2024
- ClickUp vs. Slack - December 20, 2024